
What’s this effect I hear you ask well I call it the blurred zoom effect its zooming while you are pressing the shutter realise button at the same time.
Here is an article explaining how to do it, like every thing in life, it becomes easy after a little bit of practice.
1. Control the amount of zoom
In simplistic terms you are zooming at the same time as pressing the shutter release button, but there are different techniques that you can use to do this.Sometime you will need to control the amount that you zoom as the effect can be too much, so you can zoom half the range of your zoom lens allows.
Make sure you experiment with the zooming, from out to in and the other way around or even try stopping for a split second through the shot to see what results you get. You can also try zooming out fast and then slowly and see what effect this has, just experiment and have some fun with it.
2. Watch out for the light levels
In photography they say light is your friend but using this technique with too much light can make it tough getting these results, All these shot were taken on an overcast day, also early evening is another great time to take these kinds of photos. The problem is when there is too much light you can easily over expose the photos which makes them come out too light. One way of reducing this is by having the aperture up high like F32 in some extreme cases as this make the hole in your camera lens very small which reduces the amount of light which enters the camera.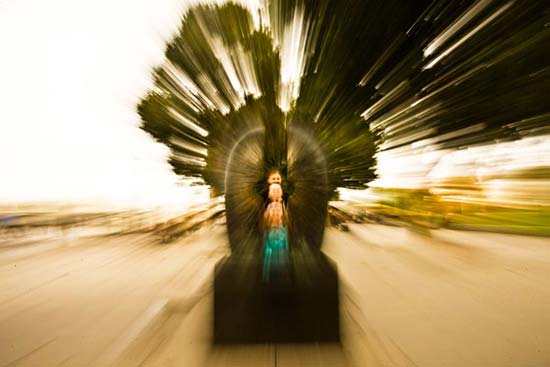
Another tip is to put your ISO down to 100 as this makes the sensor in your camera less reactive to the light, which increases your chances of getting this style of shots as this will help reduce over exposure.
3. Keeping the camera still
Ok easier said then done but you need to keep the camera nice and still when you are using this technique, make sure you are holding the camera securely as you zoom in or out. I even go to the extent of breathing out softly, this helps keep you and your camera stay nice and still.One of the very few times you could use a tripod during the day light is when you are trying to get these results, put the camera on a tripod and all you need to worry about is your zoom speed as the camera is now perfectly still this produces a different style of photo compared to hand held zoom effect photography.
4. Shutter priority mode
These photos that I took were in the middle of an over cast day, because there was quite a lot of light I had to do a few things to the camera first before I could take these style of photos.Once I have put the ISO low to make the sensor less sensitive to light I then select the Shutter priority mode on my camera.
Now the beauty of shutter priority is that the shutter speed is the only other setting you need to worry about, as a rule of thumb I always put my camera at 1 second shutter speed then take a few test shots to see the effects. I then speed up or slow down to get the effects that I want.
5. Let's go full manual
Some times it just pays to go full manual so lets get the basics setting set first. Like shutter priority mode we want the ISO down low to 100 as a base point. We will then put the shutter speed to 1 second as starting point as mentioned above and then position the aperture setting to the correct setting so the photo is correctly exposed which will probably be around the F20-F30 range if this is during an overcast day. Now we adjust the shutter speed until we get the blurred zoom effect that we like and tweak the aperture so we get perfect exposure. A top tip is to always check your cameras light meter for the correct exposure.
6. Practice makes perfect
Like the old saying goes practice makes perfect and this is no exception to the rule. By the time you take great photos with this blurred zoom effect your knowledge of how to set up and use your camera will help you greatly. Remember that these guidelines and are just a approximate settings as there is a lot of trial and error to get these photos.I have enclosed a cheat sheet that you can print and take with you while you are out taking these photos as a guide to help you achieve these photos. Please remember that this is a guide only and the settings will change depending on light levels, the camera and type of lens you are using.

Nessun commento:
Posta un commento